Croesor Rhosydd
21 July 2010

Matt Ewles
Report edited and updated following return trip in November 2011
Croesor Rhosydd - what an exciting adventure this was!
Sunday morning was not a pleasant one - heavy rain and winds pummelled the tent all night, and by morning, visibility was low and the weather was atrocious! This had not been forecasted and several people had consequently not packed as much waterproof stuff as maybe they would have liked! The drive to Croesor was equally wet with roads flooded and we were uncertain whether the water levels in the mine would have risen. One road into Croesor was blocked by flood waters.
We parked in Crosoer car park in heavy rain and got changed. Gary and I opted to walk up in boiler suit and waterproofs (after being very warm down the mine on our trip last year) while everyone else went with the full caving gear. Moral was a little low as we were pummelled by heavy rain as we changed and then walked up the hill. The walk up to Crosoer took about 45 minutes. I left my waterproofs in the entrance and opted to go through the mine with my undersuit, a thermal T-shirt and boiler suit, which subsequently proved to be fine, although full caving gear is also fine as you spend a lot of time just sitting around.
Following the entrance adit for several hundred metres reaches the first area of interest - an old brick built room in the corner of a wide open chamber. Further on, on the right hand side a short passage reached an enormous flooded chamber with a eerie lake of bottomless depths! Ignoring this and continuing ahead reaches a climb up a walled structure (with several in situ handlines) to the bottom of a long slope with a huge pipe down the left hand side. Following this uphill. several routes on the right lead to a drop into the previously seen massive cathedral. However, the way on is to follow the slope all the way to the top, where the first pitch is on the left.
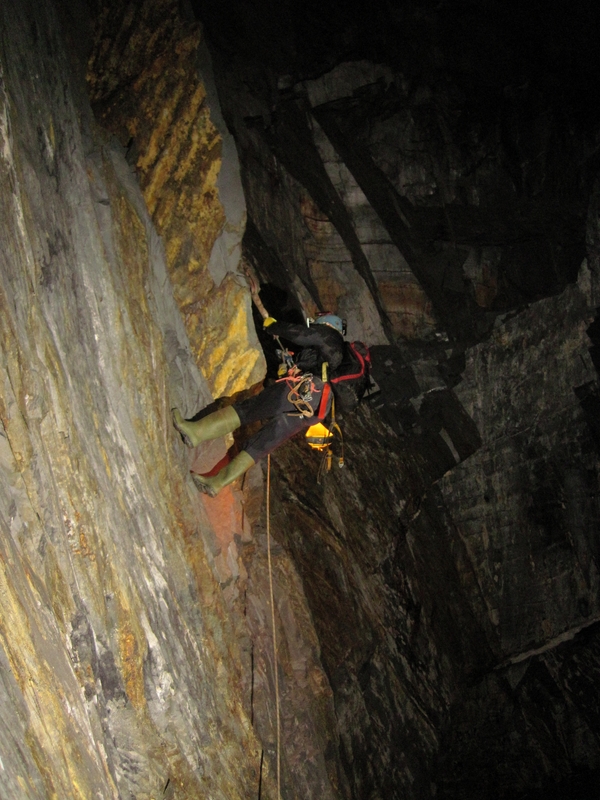
The in-situ rope looked good, so we started down,using a system of light flashes to signify rope free (as a description we had advised against making sudden loud noises due to the unstable nature of this enormous chamber - car sized blocks of slate were poised to fall everywhere). I was last down the rope. About half way down the rope, I felt a sudden jolt, as a section of completely knackered rope, worn completely to the core, jammed between the rack bars. My heart rate shot up instantly, and still being 10+m from the ground I though the rope was about to snap and that I was a goner! Thankfully it held enough for me to force my rack past the narrowing in the rope where it was worn and I continued down past the dodgy section of rope very carefully. I was glad to reach the floor!
EDIT 2011: This rope is still dodgy, although the really worn section has been knotted out, requiring a knot pass manoeuver. Several new rope protectors have been added, plastic slabs bolted to the rock which makes the top half of the pitch more re-assuring. We recommend that any future trips rig your own 30m rope, which can be derigged by a couple of fast people running back in on the way back to the car later (you walk back via the Croesor entrance). Unfortunately the bolts are not well placed to allow for a pull-through.
A 150m scramble across the slate-strewn enormous chamber reaches a slope descending through a huge archway on the right hand side, the head of the second pitch. We knew the rope had recently been replaced here so were more confident in using it. EDIT 2011: This rope is still in good condition and several new rope protectors (more plastic slabs bolted to the wall) making this pitch much more reassuring.
Glad to be at the floor, the zip wire is reached only 30m downhill. Most people were already across by the time I arrived. The trip across the zip wire was tremendous fun, and uses a Petzl steel double-pulley (as metal wires shred alloy ones). The pulley is attached to the wire, and some string, cord, or even better, a fishing reel is attached which can be paid-out quickly as the person zips across, to allow for the pulley to be pulled back. It is important to weight the pulley with a few steel krabs or it flips up and gets stuck when trying to pull it back unloaded. An in-site rope provides a backup.
Beyond here a short boat trip across a flooded section (formerly the suspension bridge) (EDIT 2011: The bridge has now been raised and a boat is no longer required here).
Following the obvious stomping route on from here reaches after several minutes (passing through several chambers) the first of three bridges. This first bridge is the easiest as it has a wooden strut all the way across it, which can be traversed while clipped into an in-situ safety line. The second bridge has absolutely nothing to walk across at all and is consequently passed by using the pulley to zip across a wire line. (EDIT 2011: The second bridge has been completely re-rigged as a traverse around the right hand side of the water with rope and a metal wire to clip into. The second section of this is quite strenuous and is pretty much a hanging travese and requires hauling yourself on the metal wire so make sure you have good gloves).
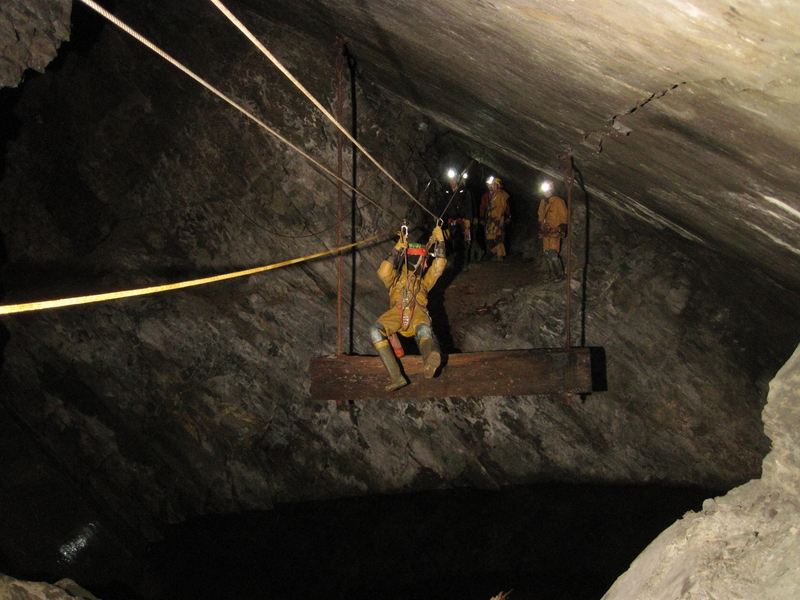
The third bridge, the Bridge of Death is soon reached. Since our last visit, a section of railway track has been retrieved and suspended across the first half of the bridge, supported in the middle by rope to prevent too much bend. This can be traversed along, clipped into a rope as backup (although this was out of reach by the middle of the bridge, and so we put a sling on a steel Krab onto the wire to enable clipping into the sling hanging down rather than the wire itself). The second section of the bridge has nothing to stand on and must be done on the pulley and wire, again with a sling between the pulley and yourself because the wire is so high up and out of reach for most people. The pulley may be returned by simply flinging it back along the wire. (EDIT 2011: Not much change, though I think the middle bit of the bridge has been re-rigged slightly to make it easier and not quite as high). Crossing the Bridge of Death is a heart pounding experience!
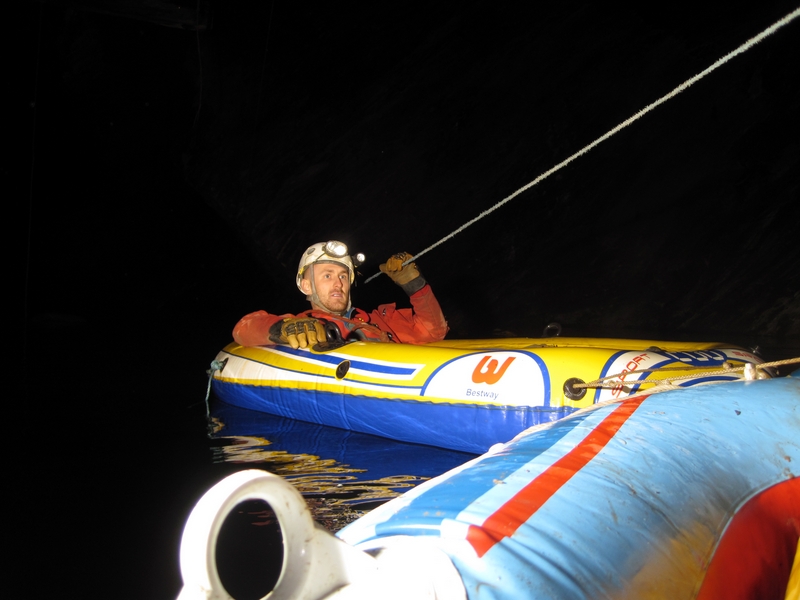
Immediately beyond the Bridge of Death, the main lake is reached, where one must abseil 5m down a fixed rope into a waiting inflatable boat on a huge bottomless lake of pale blue water. The lake is approximately 30m long, and the boats are pulled from one side to another by an ingeneous system, by which some thick polyprop cord runs a full loop from the top of the rope, down to the water level and across the water and then back to the top of the rope. We found no boats waiting for us, however, on pulling on the cord, two in-situ boats appeared out of the darkness. We inflated Stingray II to create a third boat and attached it to the floatilla. Groups of three took it in turns to abseil into a boat, before being slowly pulled across the lake to a small slate beach at the other side. Once across, a short prussik up a fixed rope regains the main passage. (EDIT 2011 not much change here, pulleys have been added to make the system more efficient, and a floating raft at the bottom of the rope allows easier access into the boat. No in-situ inflatables, but a full size canadian canoe was found which required emptying of water before use).
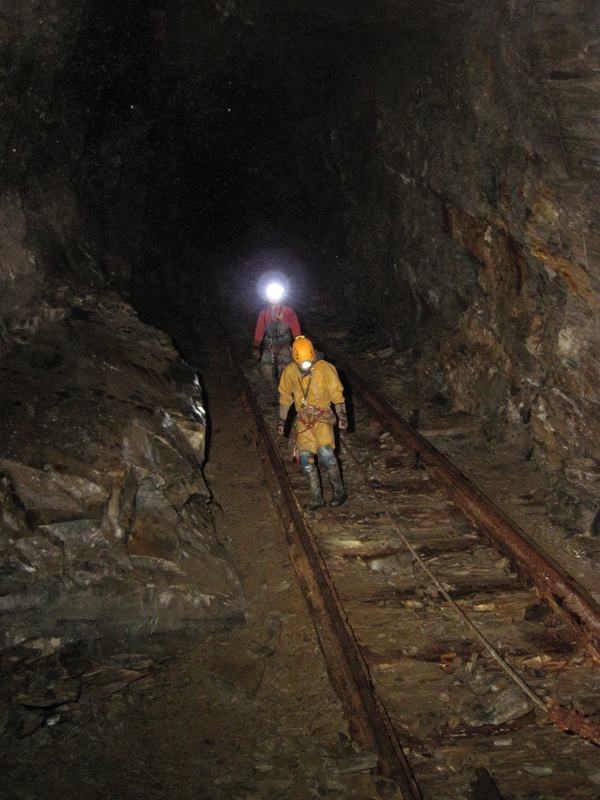
Continuing along the main passage at the top of the rope passes two loose slopes up on the right hand side. Taking the second one is the way on (not sure where the first goes) and at the top soon reaches a wall where you cross over into Rhosydd mine. Following straight on through several big chambers reaches a slate collapse in the main onward passage, which must be carefully negotiated to pop out into a huge chamber with daylight/moonlight visable from above.
Five minutes of scrambling up the chamber towards the light reaches the huge and spectacular gaping mouth of Rhosydd mine and the pouring rain again. It was dreadful weather, with no more than 15m visibility and pouring rain. Water cascaded down every possible surface!
Getting out of the deep depression at the entrance to the mine is surprisingly tricky, especially as you assume that the adventure is now over. The mine entrance is on a shelf, approximately 6-7m below the main level of the surface, with few places where you can climb up. We found this difficult last time when it wasn't even raining and slippy. Si decided to attempt a grassy slope on the right approximately 30m beyond the mouth of the mine, which he successfully negotiated, while I carried on round the side of the 'shakehole' (with a steep drop on the left) for approximately 200m until a difficult (and very exposed) climb up a loose rock face enables an escape from the depression. I returned to the top of the slope to meet Si, and we threw a rope down to assist everyone else out (EDIT 2011: Once again, extremely difficult, the rock face 200m around the right hand edge of the depression proved the best route of escape).
All I can say next is thank goodness we had taken a GPS fix at the Croesor entrance! With almost no visibility and torrential rain we wouldn't have had a hope in hells chance of finding our way back to the Croesor entrance (or the car) across the barren featureless moorland. However, the GPS prevailed and within 20 minutes of squelching the slate tower at Crosoer mine entrance loomed out of the mist and we were back at Croesor entrance to retrieve our gear. We were soaking wet but thoroughly high spirited after such a truely superb adventure.
Essential equipment for the trip includes
(A) Steel double pulley.
(B) Selection of steel karabiners (to clip into metal wires, and to weight the pulley to prevent it flipping upside down when nobody is on it).
(C) Selection of slings.
(D) 40m of cord, string or fishing line on some kind of reel for very quick reeling out on the zip wire (this needs to automatically reel off so the person holding it doesn't get their hand ripped off when someone launches themselves across the zip wire).
(E) 35m rope and some krabs/maillions to rig the first pitch. 2011: In situ rope on first pitch is very dodge, but new rope protectors are good.
(F) Another 30m rope for other uses (emergency and also to escape the depression of Rhosydd mine if necessary).
(G) Inflatable boat with pump.
(H) GPS to fix the Croesor entrance - ESSENTIAL if you want to find your way home from Rhosydd!
(I) Gloves for everyone (metal splinters from wire ropes)
Simplified walkthrough:
(A) From the entrance adit follow obvious route then climb up the walled structure and to the top of the long steep slope.
(B) First pitch at top of slope on the left (30m rope needed, in situ rope is extremely dangerous).
(C) Scramble through huge chamber to second pitch under huge archway on right (in situ rope seems sound).
(D) Zip wire is immediately reached 30m from bottom of second pitch.
(E) 10m Lake is immediately reached (boat required) EDIT 2011: Boat no longer required as bridge has been raised.
(F) Follow obvious stomping mine tunnel for several minutes (via several very large chambers) to first bridge, easy traverse.
(G) Next bridge soon after 2011: Now a hanging traverse.
(H) Bridge of death is then reaches, combination of a travese and a steel wire with pulley.
(I) Final lake is immediately reached after Bridge of Death (abseil into inflatable boats/canoe and pull yourself across).
(J) Prussik up 5m in-situ rope beyond lake.
(K) Ascend the SECOND steep sloping passage on right.
(L) Follow main route past several large chambers.
(M) Crawl through a slate block collapse in the main passage (the only unobvious bit or routefinding) into final huge chamber.
(N) Ascend huge chamber towards daylight.
(O) Follow around the right hand edge of the depression for about 200m to reach a steep rock face that can be climbed to escape the depression.
(P) Turn on GPS to find you way back to the Croesor entrance.
More articles
North York Moors valley to valley trip becomes a reality
By Matt Ewles | 13 Apr 2026
Exploration of the Excalibur MEGA extensions
By Matt Ewles | 14 Aug 2025
Excalibur streamway extended!
By Matt Ewles | 7 Aug 2025
Jenga vocally connected to River Dove valley!
By Matt Ewles | 24 Jul 2025
Dan-yr-Ogof Far North
By Matt Ewles | 27 May 2025
Brown Hill Pot
By Matt Ewles | 22 Apr 2024
Sunny Bank Holiday in Wales
By Matt Ewles | 5 Jun 2023
Avoiding the January Blues in Rift Pot
By Tash Durham | 16 Jan 2023
North Wales Slate Mines 2022
By Matt Ewles | 5 Dec 2022
Long Churn beginners trip. 10th October 2022
By Conor Morrison | 11 Oct 2022